Russel Kwan
When I was a lot younger, I wished I could see some real-world darkrooms to see how they were designed, and to see what their owners found useful. In that spirit, here's a little tour of our darkroom. I made these pictures without tidying the place up, so you can see an operational darkroom.
First of all, some of the gear you'll see here is not absolutely necessary for the production of fine prints. Some gear simply makes the process more efficient, a feature I have come to value given the inherent inefficiency of our processes.
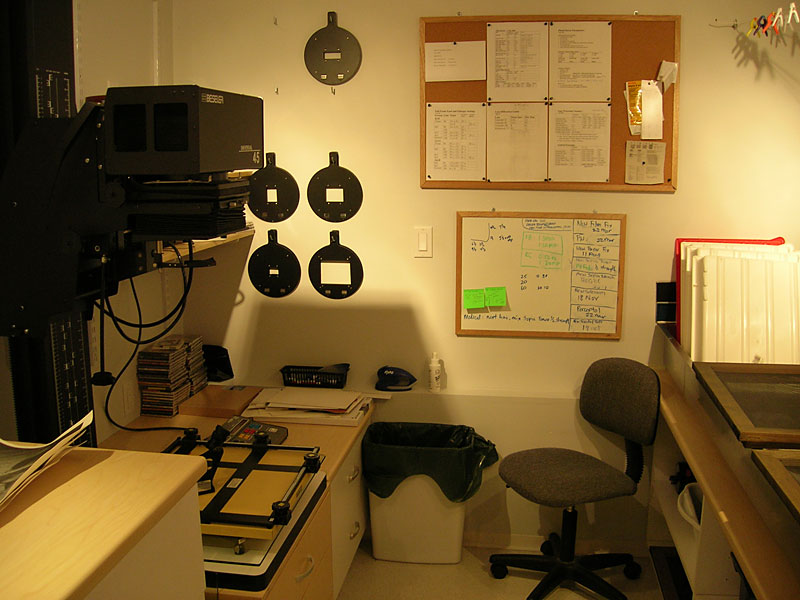
Our darkroom is a windowless, purpose-built 9’x13’ room at our studio, sealed by a light-tight deadbolted steel door. It is designed for one person to work both comfortably and efficiently. One long side of the room is almost entirely sink, called the “wet side”. The other side of the room has counters and the enlarger setup, called the “dry side”. The room is ventilated with an negative-pressure system that sucks unpleasant sink smells away from the worker.
Above is the view into the room from the doorway. I couldn’t fit the whole room into the viewfinder of my digi-point-and-shoot (damn those undersized sensors!), but you can get a good idea of the layout. To the left is the dry side, and to the right is the wet side.
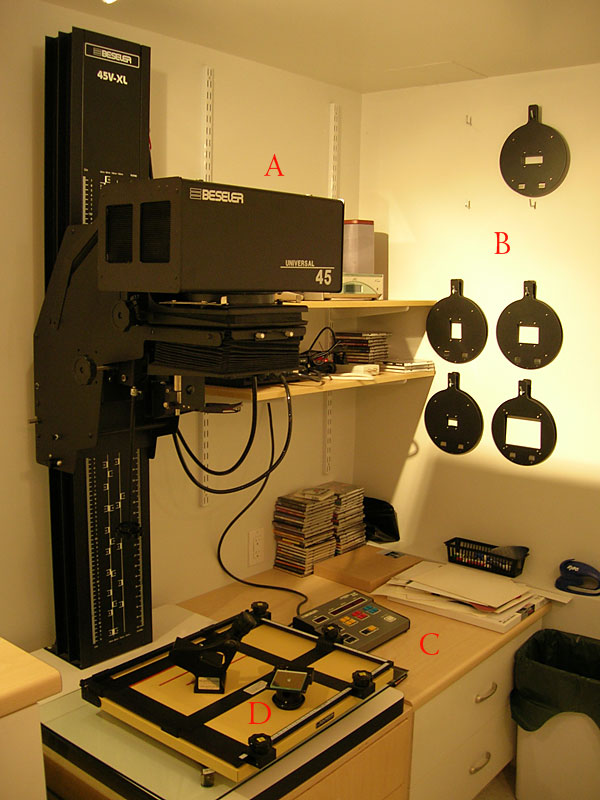
Above, the enlarger dominates the dry side.
A: We use a Beseler 45V-XL fitted with a Universal Colourhead. The head is computer controlled for colour lamp output – and the lamps are RGB, which work particularly well for black & white printing. The control module is on the counter just to the right of the enlarger. The enlarger also has a power stabilizer module, which is just a black box sorta visible behind the enlarger on the lower shelf. The whole thing is massive, and weighs about 100 lbs – my neighbor, a master woodworker, designed and built the reinforced cabinet that supports the rig.
B: On the wall are the negative carriers for the formats we shoot: X-Pan panoramic, 6x4.5cm, 6x7cm, 35mm and 4x5inch.
C: Photo paper is stored in paper safes in these drawers.
D: 4-blade 11x14 easel, with Peak focus finder and Zig-Align. The 4-blade easel makes it easy to create arbitrary sized borders. The Peak focus finder works right into the corners of the projected image, making it easy to reconfirm enlarger alignment and focus anywhere on the image. The Zig-Align is an amazing piece of gear that uses mirror-based repeating reflections to accurately and efficiently align the negative, lens and paper stages of the enlarger. The easel rests on a sheet of 6mm glass, which in turn rests on an Ease-Align, another ingenious device from Bill Ziegler that makes aligning the paper stage to the other stages very fast. With this setup, there is absolutely no excuse for not having the enlarger perfectly aligned!
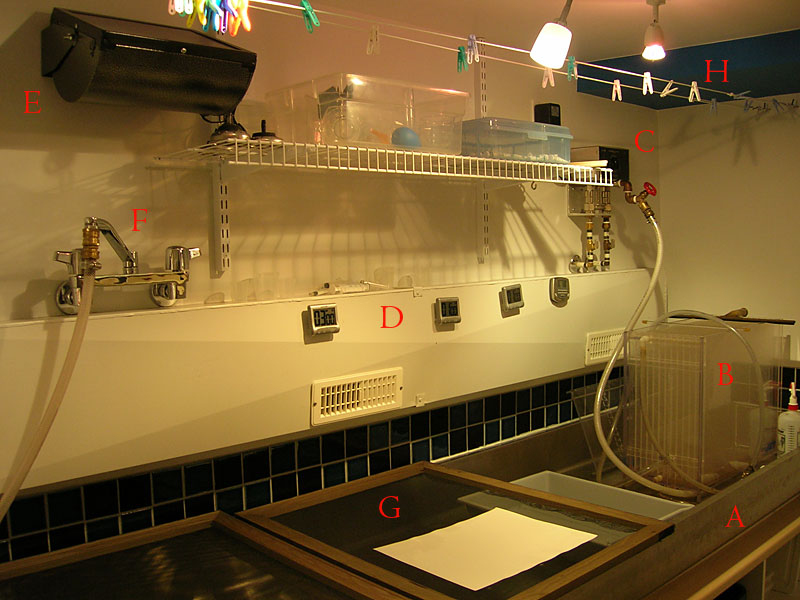
Above, the sink dominates the wet side.
A: The custom-made stainless-steel sink is 33 inches x 12.5 feet. I’ve concluded that ya can’t have too much sink, because I’ve wished for a couple of more feet on more than one occasion… There is lots of storage under the sink for chemistry, trays, and bits and pieces. We keep everything in plastic Rubbermaid containers to limit accidents.
B: Inglis CrossJet 16x20 archival print washer. Alistair Inglis handmakes these beauties right here in
C: Hass Manufacturing water temperature controller. Just set the temperature you want, and the controller delivers it. It’s perfect for maintaining correct temp when washing prints for an hour, as well as delivering tempered water for chemistry mixing.
D: Main duct for the ventilation system. Air is sucked into those grilles, moving smells away from the operator’s face. There are 4 digital timers stuck to the duct – you never can have too many timers!
E: Safelight. We use Ilford-spec OC amber filters.
F: Basic water supply. We’ve got all our hoses on brass quick-release fittings. All of the water in the darkroom is charcoal and 1 micron particle filtered. There’s quite a bit of iron in our water, and without the filtering, distressing spots sometimes appear on prints during toning.
G: Print drying screens for drying fiber prints. We homemade these from canvas stretchers cheaply available at art supply stores and nylon bug screen from Home Depot.
H: Drying line for RC work prints.
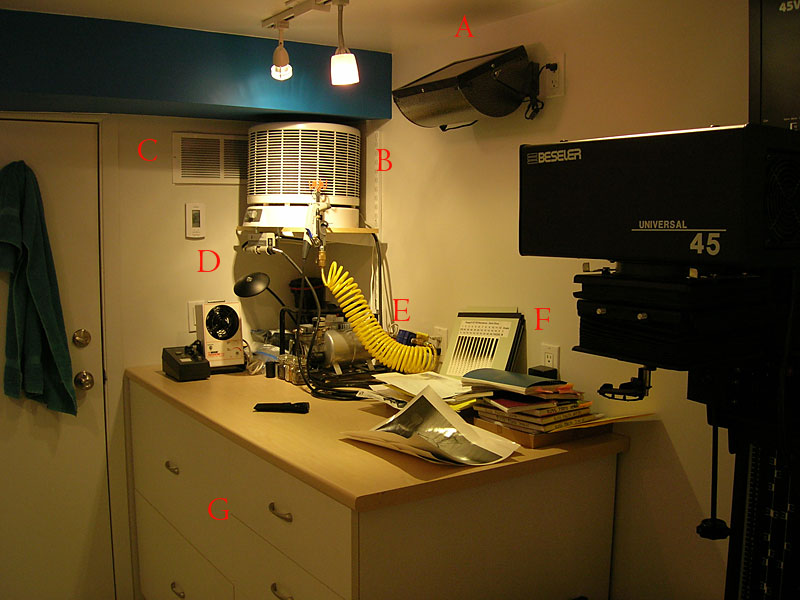
Above, the remainder of the dry side.
A: The other safelight.
B: HEPA air cleaner. Dust is the enemy.
C: Fresh air intake. Because the ventilation system sucks air out of the room, air has to come back in somehow. There’s a filter behind that grille – dust is the enemy.
Below ‘D’: anti-static ionized air blower – cheaply available on eBay from the electronics industry – dust is the enemy.
Right of ‘D’: anti-static ion generator for compressed air – dust is the enemy.
E: Air compressor – dust is the enemy.
F: Contact-printed step tablet contrast charts for all of the papers we use – these charts are useful as a reference when adjusting print contrast. See Ctein’s book “Post Exposure” to see how to do this!
G: More storage. Ya can't have enough storage.
Not Shown: Our Photo-Therm film processor, and our finishing area – these will be future soapbox topics… stay tuned!
Google Analytics