Google Analytics
Digital Printing Masks for Traditional Silver Gelatin Prints
July 2009
Russel Kwan
Click here for Russel Kwan and Wendy Kwan Black and White Fine Art Photography Home Page.
There always is a group of negatives I fight with, sometimes for years, to obtain some kind of decent print. I fight with those negatives on and off, usually with some empty months in between where I mostly sulk about not being able to print them. Very occasionally, I have some kind of breakthrough that makes a good print from one of those negs possible, and I like to celebrate those moments because they occur all too rarely. Today was a day to break out the single malt.
I'd been fighting with this particular picture of the interior of Mission San Xavier del Bac in Tucson, Arizona for two years, and the best I could do was this print:
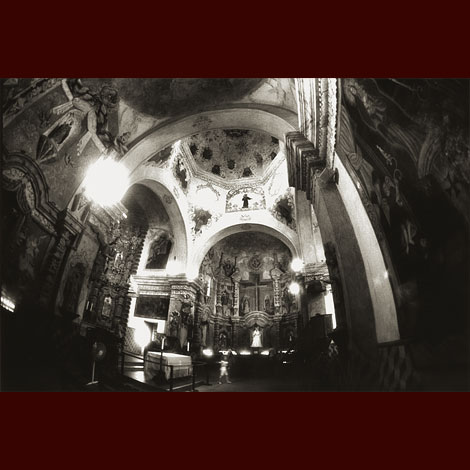
Even with extensive dodging and burning, split-grade printing, and pretty much all the other tricks I could bring to bear, I couldn't properly print the details in the hot, hot windows in the dome, nor reduce the size of the flare of the interior lights, nor pop out the details in the shadowy areas of the dome and the side walls and the chapel altar. But, the negative contains all of that information - I've just never had the skills to present it.
The complicated dance of burning and dodging needed to get even the print above started my search for a more efficient process. I tried taking a work print, and cut holes in it in the exact shape of the areas to burn, so I could do all of the burns in one pass. This worked to a certain extent, but required (more or less) that all of the burns be of the same duration - something that didn't work for this particular picture. What I needed was some kind of variable density mask... and eventually, I turned to PhotoShop.
I produced and scanned a low-contrast print of the church. The low-contrast print contained all of the desired detail, but had no drama and no life. By using PhotoShop and Darkroom Automation's amazing little darkroom meter, I was able to create a variable-density mask for all the burning. Along the way, I also discovered the same mask could be used to handle all the dodging, and incredibly, could also be used to alter local contast. Finally, an effect much like unsharp masking can be achieved with the same mask. And it can all be done with one exposure. Pretty efficient!
I haven't yet really scratched the surface of this technique - I really just stumbled upon it in the past week - but I've already produced my best print of Mission Xavier yet.
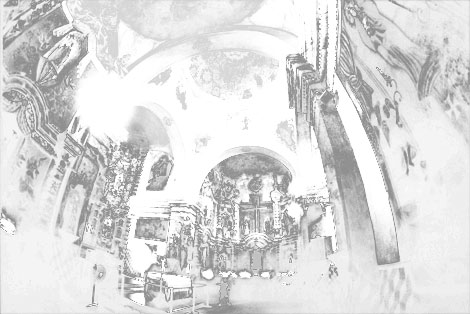
Below is my current mask. It is printed on a HP LaserJet printer on transparency material and handheld in the enlarger lightpath below the lens. The 3M transparencies I'm using are so transparent that they have no effect on image sharpness. In fact, with the unsharp masking effect of this mask, the final image actually seems sharper. Even the film grain has the same appearance as the first print above.
And here's the final silver gelatin print...
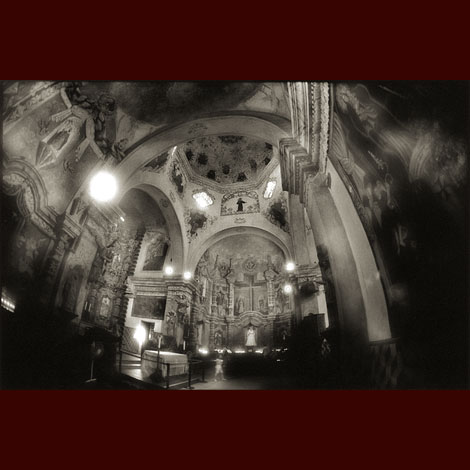
The upper windows now not only have shape, but their painted details, and even their iron bars are clearly printed. The image of San Xavier just below the dome is no longer a black silhouette, but a portrait. The details in the dome and in the chapel altar pop out, as well as details in the shadows around the edges. The flare of the interior lighting is much reduced. Click here for more information on this photograph of Mission San Xavier del Bac.
Here's a peek at the details in this print...
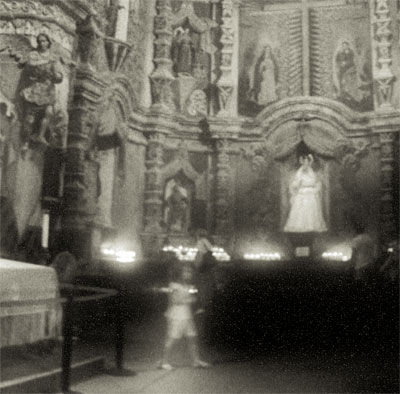
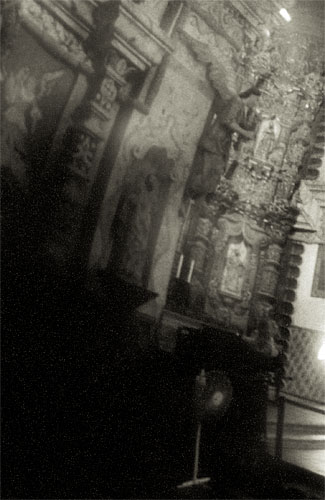
The Altar...
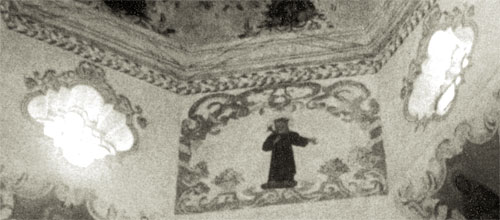
The windows just below the dome...
Detail of the wall to the left...
I am now pursuing the technique of digital masking on other "problem" negatives and hope for further miracles.