Homemade Large Format Pinhole Photography: Making the Drãnoflex
Russel Kwan
Click here for Russel Kwan and Wendy Kwan Black and White Fine Art Photography Home Page
So one day, for no good reason, I decided to get into pinhole photography. It seemed like a perfect escape from all the machinery and precision of my usual practise, and offered a chance to do a homemade thing. I worked out a wish list for my new dream camera:
- Very cheap.
- Very durable.
- Easy to make.
- Simple to operate.
- 4x5 inch film capable.
- Looks innocuous, if not foolish.
After messing about a bit with the usual Pringles cans and shoeboxes, I stumbled upon my ultimate camera body in our local Home Depot: 4 inch PVC drainpipe and fittings. Cheap? Hows about 5 bucks a camera? Durable? Well, the pipe is literally made to endure… well… poo. While buried underground. Easy to make? Any idiot who can operate a power drill can make one. The Drãnoflex was born. We’ll get to the fine craft of camera operations in a minute.
If you want to make a Drãnoflex, here’s what you’ll need to do:
- Head down to your local plumbist boutique, and get some 4 inch PVC (that’s plastic) drainpipe, a plastic end-cap fitting for one end, and a cleanout fitting with screw-on hatch for the other end.
- Find a power drill and a saw and a strong pair of shears and a rat-tail file.
- Find a needle – the ones that come in those little kits with buttons and things in hotel rooms will do.
- Find some fine-grit sandpaper – I used #400.
- If you have a micrometer, so much the better, but it’s no big deal to not have one. It just makes making a bunch of same size pinholes easier.
- Find a can of beer. I used Kilkenny, because the cans are big, and the beer is good. Enthusiastically swill the beer and save the can.
- Find a roll of plastic, black electrician’s tape.
- Find a wide rubber band (I use the nice blue rubber bands that broccoli comes in. You don’t actually have to eat the broccoli, but I like the stuff).
Here’s what you need to do:
- With the saw, hack off a 5 inch long piece of PVC pipe. This is your main camera body.
- With the power drill (and possibly the rat-tail file) make a 1 inch or so diameter hole about halfway down the pipe. You don’t need to be neat, and you don’t need exactly a 1 inch diameter, and the hole doesn’t even really need to be round, or even halfway down the pipe. Make sure you file off all the rough edges, though.
- Carefully wash your handiwork – get all the plastic filings and other crap and corruption out of the pipe. While you’re at it, wash the end cap and cleanout fitting, too. Dust is the enemy.
- Whack the end cap on one end of the pipe, and the cleanout fitting on the other end. These things fit on tight (and are amazingly light-tight, too) so some enthusiastic whacking is required. I used a rubber mallet, and sang the heigh-ho song for fun.
- Use the strong shears to cut a piece of beer can that will comfortably cover your new hole-in-the-pipe by half an inch or so all round. I cut a square piece, and just trimmed across the corners of the square, leaving no sharp corners.
- If you have a micrometer, and feel like being geeky, figure out the place on the needle where the diameter is 0.48mm. Mark that point off with some electrician’s tape. Now, you can make a bunch of holes about the same size. By the way… there’s nothing magic about the diameter I’ve recommended – you can hunt around the web for all sorts of interesting math that gives all sorts of different answers for the “correct” size of a pinhole. My pinhole diameter yields roughly f/128 (determined experimentally, not mathily - the math suggests it's more like f/170).
- If you don’t have a micrometer, just estimate the size of the hole – it’s not really all that important to have exactly my recommended diameter anyways. On my hotel needle, it’s about 2/3 of the way along the curve from the point to the full thickness of the needle.
- Using the needle, make a pinhole in the piece of beer can by pushing the needle in just barely far enough to puncture the metal, then using the sandpaper to sand the surface completely flat, then pushing the needle in a little further, and sanding again,… and … you get the idea. The object is to get a hole that is as smooth as you can get it – and no smoother. I think part of what gives each pinhole its character is a slight lack of perfect smoothiness – which is why homemade seems to perform better than laser-cut.
- Use the electrician’s tape to affix your beer-can-pinhole to the camera body. Don’t skimp on the tape – you don’t want to leak light around the edges of the beer can.
- Install your shutter: place the wide rubber band around the pipe so it covers the pinhole.
- Your Drãnoflex is now ready for action.
Loading the Drãnoflex:
- You’ll need some 4x5 inch film.
- Open the Drãnoflex by unscrewing the cleanout hatch cover.
- Make sure the shutter (that rubber band) is covering the pinhole.
- Turn off the lights. You will need Total Darkness. Very Total.
- In Total Darkness, open the box of film, and take out a sheet. Find the emulsion side of the sheet – if you don’t know how to do this, read my little article on handling 4x5 sheet film. The emulsion side must be facing the pinhole when inside the camera.
- Gently flex the film to match the curve of the pipe, emulsion side inward, and slide it into the camera body. You may orient the film portrait or landscape – it works both ways, and makes quite different pictures. Make sure the film is opposite the pinhole – this takes a bit of practice, but it’s not too hard. Precision is impossible and unnecessary – just make sure the film is more-or-less opposite the pinhole, or it can’t record a picture.
- Screw on the cleanout hatch cover.
- Close the film box.
- Turn on the room lights.
Making an exposure:
- Place the Drãnoflex in a position where it will be steady for several seconds. You can lay it on the ground, or clamp it to something solid. You can’t really hand-hold this thing at all.
- Uncover the pinhole by pulling the rubber band aside – you don’t need to take the rubber band off – just slide it off the pinhole.
- Expose. The exact exposure that works for you will take some trial-and-error, but a good starting point is between 2 and 8 seconds on a bright sunny day with ISO 400 film.
- Replace the rubber band before moving the camera.
Unloading the Drãnoflex:
- Turn off the room lights.
- In Total Darkness, unscrew the cleanout hatch, and remove the sheet of film.
- Place the sheet of film into a light-tight box, or into a light-tight processing tank.
- Turn on the room lights.
- Process the film – this step is beyond the scope of this article.
Enjoy Drãnoflex! You will find there are two orientations for film in the Drãnoflex, and two orientations for the camera when shooting: portrait and landscape. Due to the curvature of the film inside the camera body, each combination leads to different types of pictures, with different types of distortion. Have fun with it!
Google Analytics
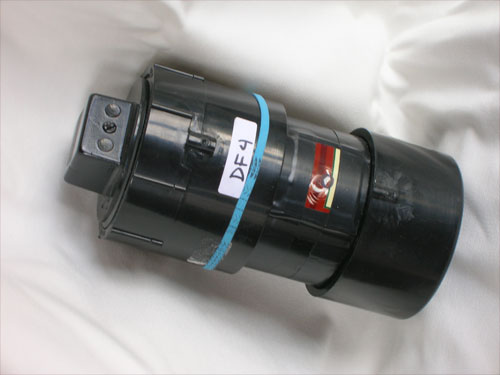
The completed Drãnoflex - the shutter has been pulled aside to reveal the piece of beer can (the brown rectangular thing) with the pinhole in it.
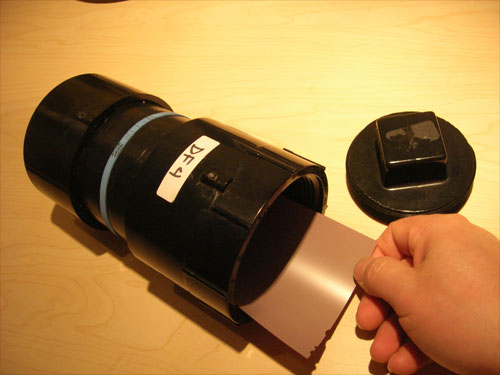
4x5 film inserted for "Landscape" orientation. Note the position of the notches.
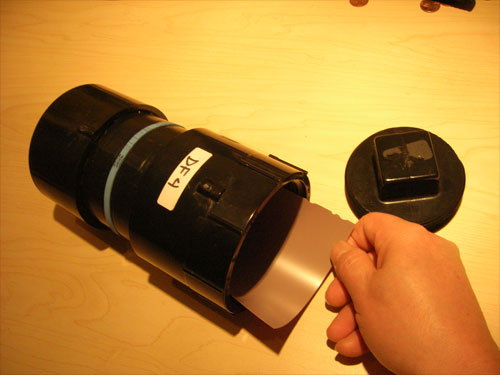
4x5 film inserted for "Portrait" orientation. Note the position of the notches.
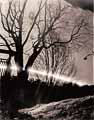

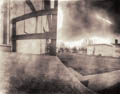
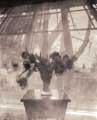
These photographs were all made with Drãnoflex. Click the thumbnails for more information.
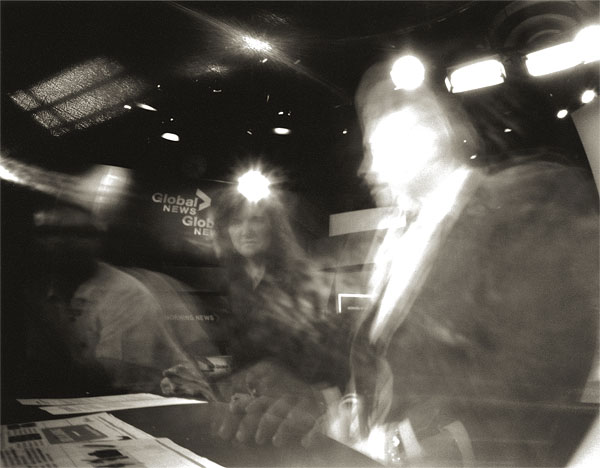
Here's Drãnoflex's debut on Vancouver's Global TV Morning News, 20 April 2009. The negative was printed on Worldwide Pinhole Photography Day, 26 April 2009. I made this demo picture live-to-air with co-anchors Lynn Colliar and Steve Darling, about a 1 minute exposure. Click here for the clip.