When I was a lot younger, I wished I could see some real-world darkrooms to see how they were designed, and to see what their owners found useful. In that spirit, here's a little tour of our darkroom. We made these pictures without tidying the place up, so you can see an operational darkroom.
First of all, some of the gear you'll see here is not absolutely necessary for the production of fine prints. Some gear simply makes the process more efficient, a feature I have come to value given the inherent inefficiency of our processes.
Our darkroom is a windowless, purpose-built 9’x13’ room in our studio, sealed by a light-tight deadbolted steel door. It is designed for one person to work both comfortably and efficiently. One long side of the room is almost entirely sink, called the “wet side”. The other side of the room has counters and the enlarger setup, called the “dry side”. The room is ventilated with an negative-pressure system that sucks unpleasant sink smells away from the worker.
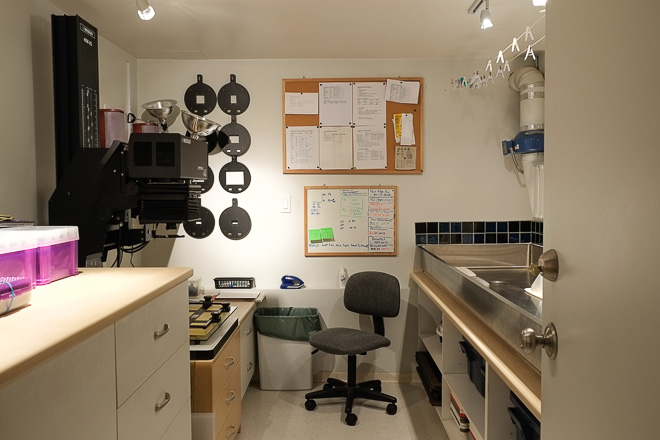
The view from the doorway. On the dry side (left), that's our Beseler 45 VXL enlarger with a Universal 45 colourhead. On the far wall are negative carriers for all the formats we shoot: 35mm, 6x4.5, 6x6, 6x7, 6x9, 4x5 and X-Pan. We like to work seated, so the enlarger is set on a custom-made, hugely reinforced cabinet - made by our next door neighbor and custom furniture designer Ivan Antoniw. There's lots more storage in big drawers on the left. On the right (the wet side), that's our sink, running the length of the room, with open storage for trays and chemistry underneath. The sink is also set a little lower than a standard kitchen sink to facilitate working seated.
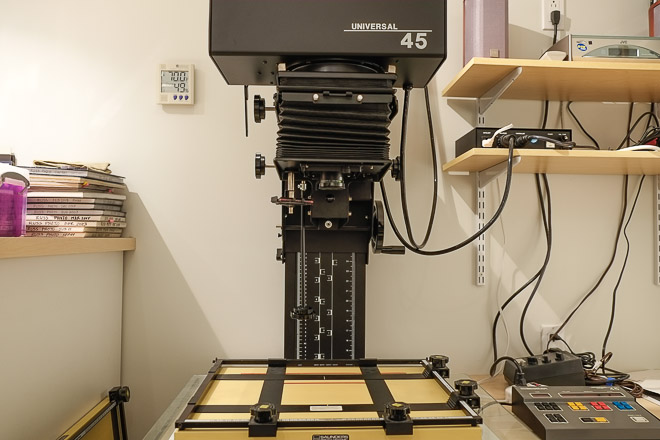
Our Beseler 45 VXL enlarger, front view. We use Saunders easels - that's the 11x14 one on the enlarger, and a 16x20 barely visible to the left. The enlarger's control module is the electronic panel to the right, and behind it is a spare LPL ET-500 darkroom timer we use for things like solarization exposures. On the lower shelf to the right is the enlarger's power supply and voltage stabilizer. On the top shelf is a small stereo and CD player. On the wall is our thermometer and hygrometer, which also monitors temperature and humidity inside our negative storage safe (see below). Our stacks of notebooks can be seen on the high counter to the left.
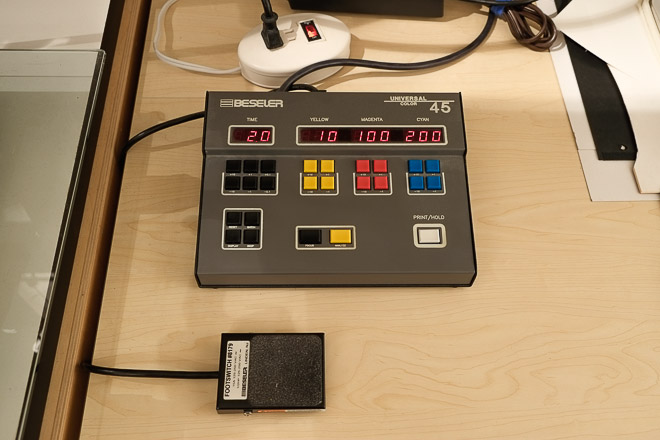
Closeup of the Beseler Universal 45 Colourhead's control module, with time in seconds, and filter values for YMC. Below is the optional footswitch for starting the printing clock.
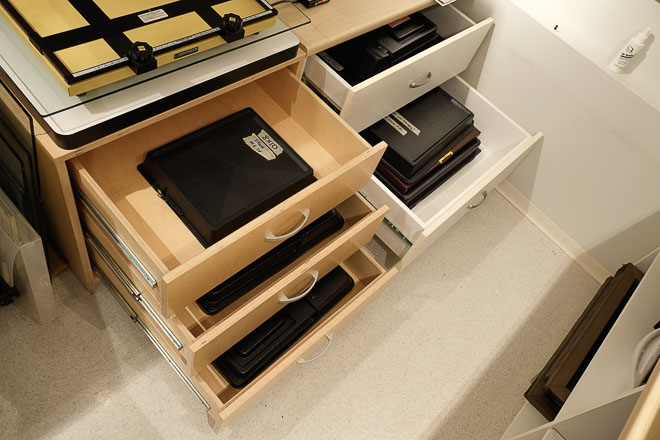
Our printing paper storage, in light-tight boxes. It's all kept in drawers under the enlarger and right next to the enlarger for easy access.
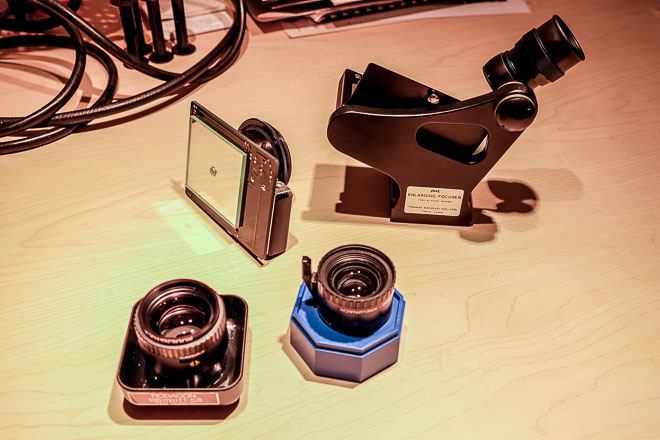
A few of our indispensable tools. Top right: a Zig-Align, made by Bill Zigler - we use this to keep our enlarger in perfect alignment. Ironically, alignment matters more for the larger formats - and 4x5 requires near-perfect alignment. Top left: Peak 1 Enlarging Focuser. Permits inspection of enlarger focus right to the frame edges. Bottom: two of our enlarger lenses - we exclusively use Schneider Componon-S and Rodenstock Rodagon lenses.
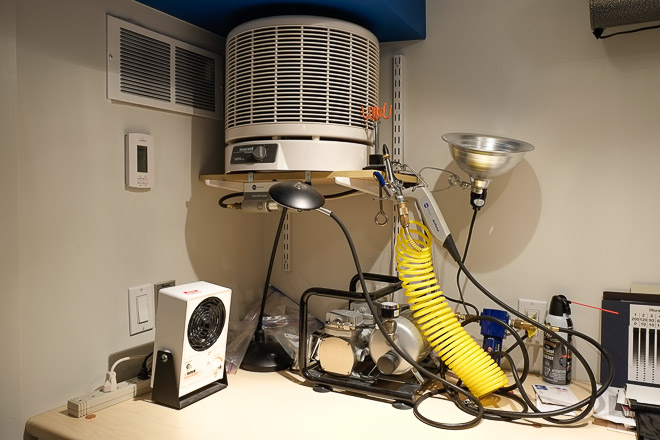
Dust is the enemy! These are our dust-control devices - on the top shelf is a Honeywell HEPA air filter. The little white box to the left is an Simco Aerostat anti-static blower, rescued from the electronics industry. It blows a stream of balanced positive and negative ions to cancel static electricity. The caged metal cylinders are our air compressor, which is connected to an Ion Systems Air Force anti-static generator - the silver gun-like thingie attached to the hose. We use various safelights in this darkroom - there's a red LED lamp in that silver reflector. We also have amber safelights for other materials. The control panel on the wall is for the radiant floor heat - we're in here for long periods of time, and comfort is a requirement.
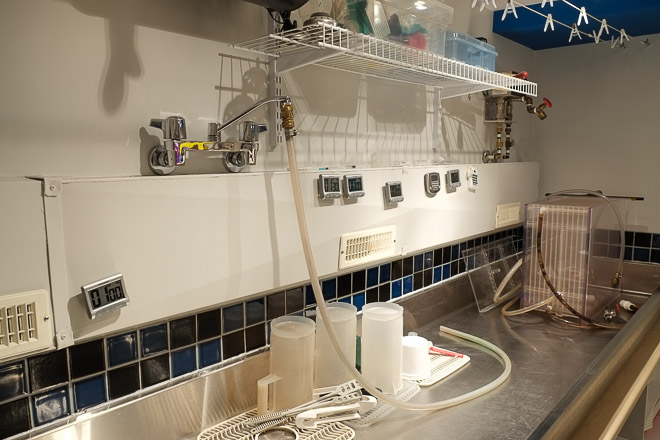
The wet side of the darkroom. The sink runs the whole length of the darkroom. Above the sink is our negative-pressure ventilation system - it sucks air out of the darkroom, keeping vapours away from our faces. The shelf above contains measurement glassware and wet-side odd's 'n ends.
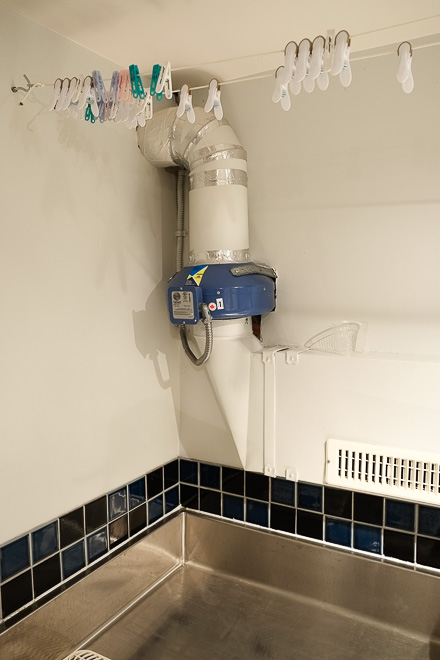
The industrial fan that powers our ventilation system. We hang RC prints on clothespegs over the sink to dry, just like in the movies.
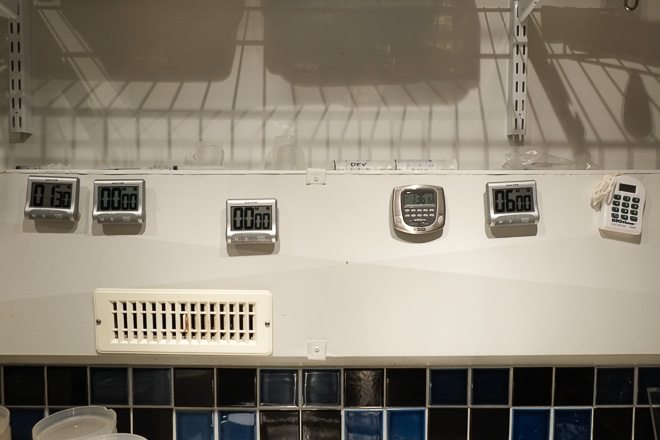
You can't have too many timers.
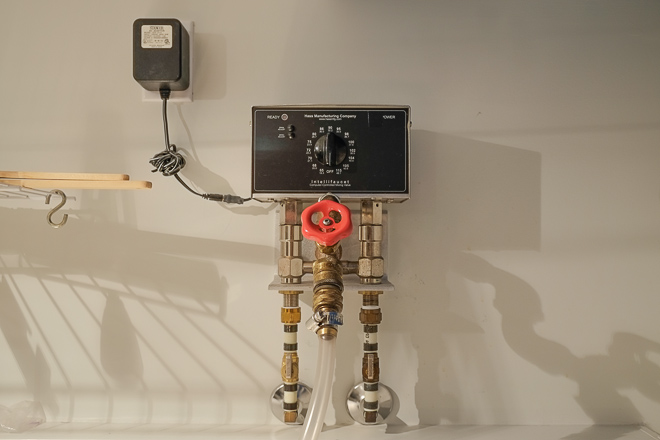
Our industrial computer-controlled water temperature controller - a Hass Manufacturing Intellifaucet. Set the desired water temp, and the mixing valve does the rest.
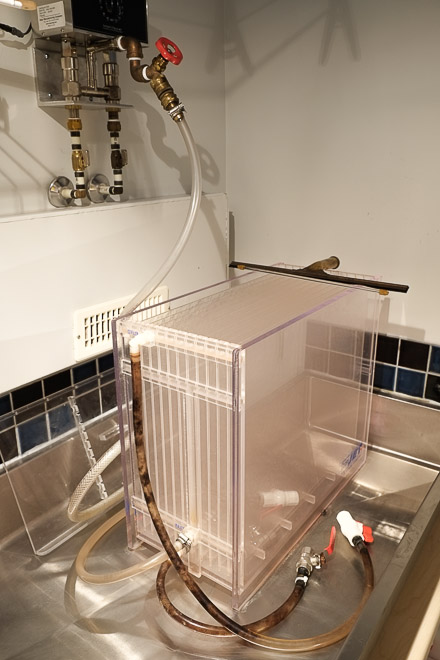
Our Inglis CrossJet print washer - the finest print washer in the world, handmade right here in Vancouver by Alistair Inglis.
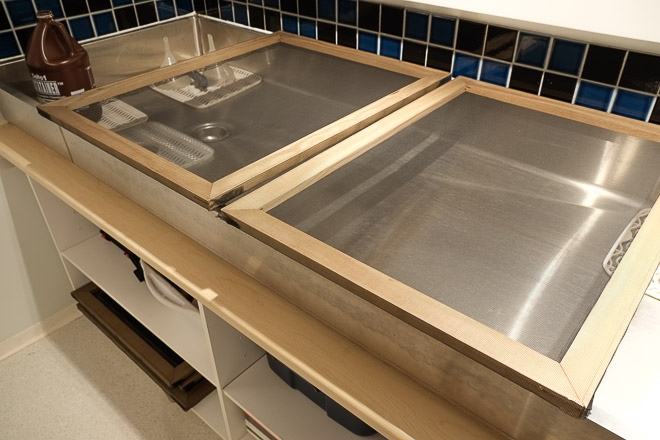
Our fiber-print drying racks, homemade out of canvas stretchers from the art supply store, and nylon bugscreen from Home Depot.

Burning and dodging tools. This basic set of shapes takes care of 95% of our needs.
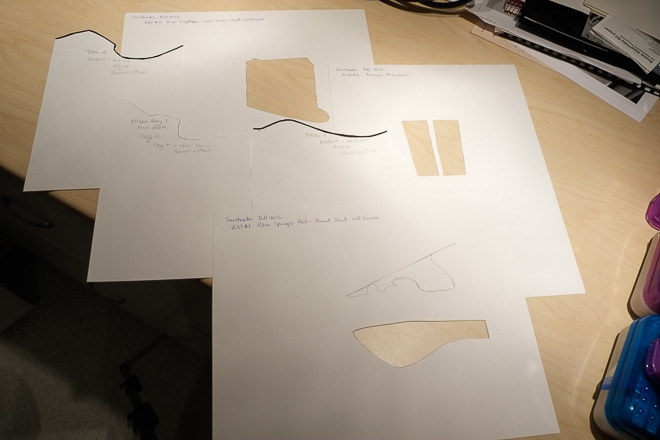
Custom dodging and burning masks - for the really complicated situations, a one-off mask gets made.
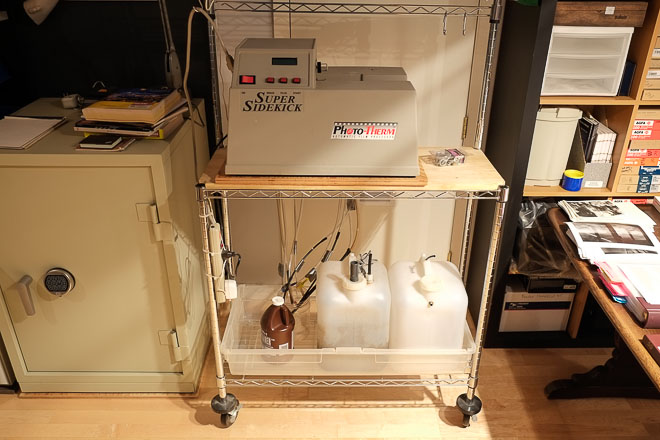
Our Photo-Therm Super SideKick SSK-8 film processor. Processes B&W and E6 painlessly. Is programmable for temperature, agitation, timings. Manages solution temperatures automatically. Uses Paterson system reels for roll films, and custom holders for 4x5. Saves heaps of time and avoids heaps of mistakes. To the left, our fireproof media safe for negative storage.
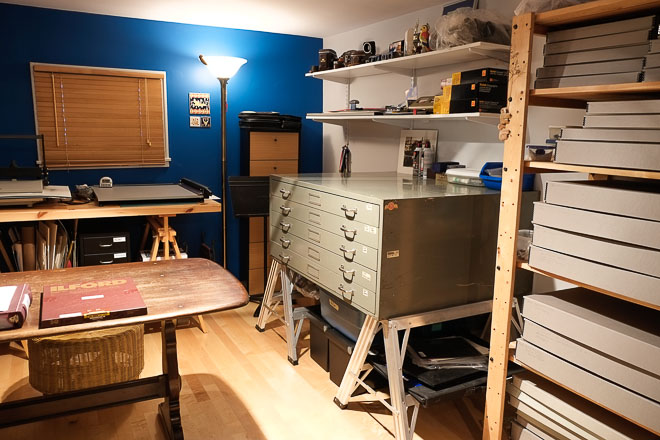
Our print finishing and storage area. Prints are stored in archival boxes on the racks to the right.
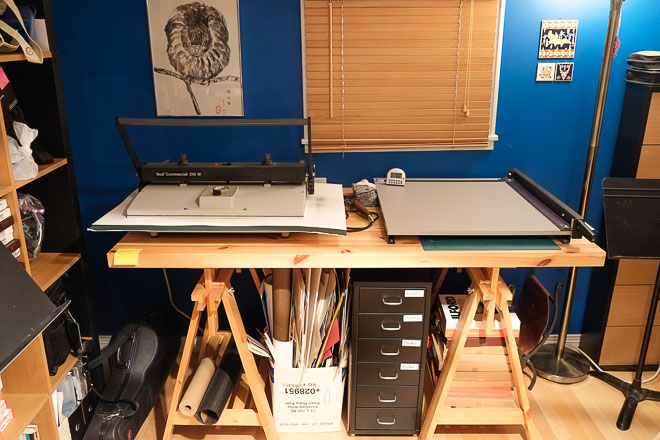
Our Seal Commercial 210M dry mount press on left, and our guillotine trimmer on the right.
Google Analytics